So… here we all are, stuck in our own little worlds for the next little while, so Easter is going to need a bit of rearranging. We are not going to give up on a tradition that’s been going for as long as I can remember – we just need to shake things up a bit.
Time to get creative!
Well, that’s kinda the point of decorating eggs, right?
So, I’m going to walk you through some of the techniques my family uses and you can all play along at home – get creative with whatever you have and we’ll all have some socially-isolated fun together.
The first step towards your own eggstravaganza – the blowing of the eggs
When we first started decorating eggs, as children, the eggs were hard-boiled. We decorated them, then we ate them – fun AND tasty! But not very long-lived.
When the decorations started to get too good, my parents decided to work out a way to keep them. My dad started drilling holes in the ends of raw eggs and blowing the contents out. The eggs were decorated then varnished, and the Great Hodgkin Egg Colleggtion collection began.

Look where we’ve ended up!
One of my big goals as a child was to be able to blow an egg. Every year my dad would drill holes in eggs and every year my two brothers got to help blow the egg out. But I never could get the hang of it – no matter how much I puffed out my cheeks or how hard I blew, nothing would come out, and I’d just end up dizzy. It’s taken a long time, but now I can finally tick that off my list – at least one small benefit of being stuck at home!
Nowadays we usually use a much more elaborate process, which involves dental drills and an air compressor – very clinical and clean!
But hard to replicate for the average house-bound family.
So when I decided to get you all creating your own social-isolation Easter traditions, I realised this was my chance to shine. I got out my carton of eggs, grabbed a skewer, and set out to prove that I COULD blow an egg – at last!
And now it’s your turn…

You don’t need special tools to blow your own eggs – just a bit of patience!
Grab an egg and give it a wash – you’ll be sticking your lips on it, after all!
* disclaimer here – yes, you are blowing the egg out with your mouth, and we would usually eat the contents. That’s a bit nerve-wracking in these COVID-19 times, so use it for scrambles or make a cake, so the egg will be thoroughly cooked.
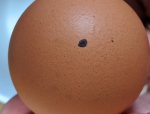
Mark your egg at either end with a marker pen, partly so you can see where drill your hole, but mainly so you can tell when you are making progress!
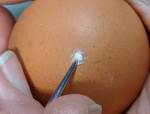
Eggs are remarkably strong – the ideal, strongest shape – so you’ll need something sharp to make the hole. I started out with a metal cake skewer, which did work but took a lot of effort. I found a large tapestry needle was much faster.
Then just start scratching, keeping your needle in the one spot. Within a minute or two you’ll start to get through to the white chalky layer below the hard shell. Just a little further and you’ll break through. Now you’re on the home stretch. Swap to a skewer so that you can expand the hole, as it will be hard to blow the egg out if it’s too small. Just be careful not to crack the shell around your hole.
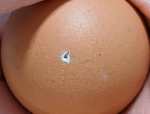
Success? Yay! Now you get to turn it over and do the other end. It may leak a little so best done over a bowl.
Once you’ve drilled both ends, carefully pop your skewer back in and mix the insides a bit. Without this step the egg won’t come out of the shell – maybe that’s what I did wrong as a child…
Rinse the egg, hold it over a bowl, take a deep breath and blow, baby, blow!
If your holes are big enough and you’ve broken the egg up inside then before you know it you’ll have an empty egg. Not working? Just try mixing the egg a bit more.
Once you have blown all the egg out (see, I have faith in you!) then you need to wash out the inside. Hold a finger over one hole, then hold the other hole under a flowing tap. Once you have some water inside, shake it around to clean the inside of the egg then blow the water out – which is so much easier to blow than egg yolk!
Dry the egg by placing it in an oven on the lowest setting or leaving it overnight.
Want a faster method? Try a real drill!
If you are feeling braver, and have one handy, you can try using an electric drill.
I had a go with my IKEA drill, with the egg held securely in a small jar – just make sure that the base of the egg doesn’t touch the bottom or the egg is more likely to move around.
It was definitely quicker, but I had more trouble stopping the end cracking. Worth trying, but maybe practise before you try on your good white eggs!
So there you have it. Have a go for yourselves and get ready to have some fun on Easter Sunday!
